
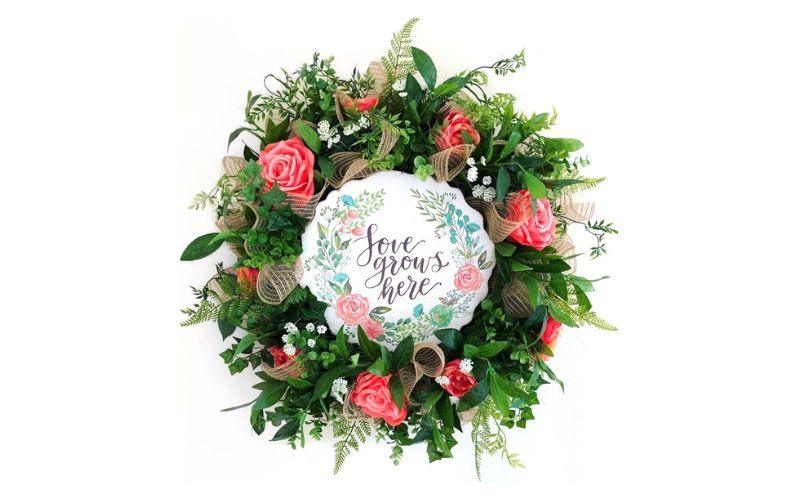
Spring will be here before you know it and what better way to usher in the new season than a beautiful DIY spring wreath for your front door!
Rather than using traditional pastels for this project, we’ll take some inspiration from nature itself and incorporate various kinds of greenery and add a pop of color – similar to what you find looking out your window on a pretty spring day.
The majority of the supplies for this project can be found at your local Michaels and the great thing about garden-style wreaths is that you can use virtually any greenery to replicate this same “airy” look.
I really love how this turned out and I know you will too!
Supplies for this project:
- Evergreen Wreath Base
- 3 Coral Bella Rose Stems (Michaels)
- 1 Cabbage Rose Bush (JoAnn)
- 3 Eucalyptus Floral Picks (JoAnn)
- 1 Light Green Fern Spray (Michaels)
- Ficus Bush (Michaels)
- Mini English Ivy Bush (Michaels)
- 3 Olive Leaf Stems (Michaels)
- 3 Queen Anne’s Lace Stems (Michaels)
- 10″ Roll of Natural Burlap Deco Mesh
Preparing the Wreath Base
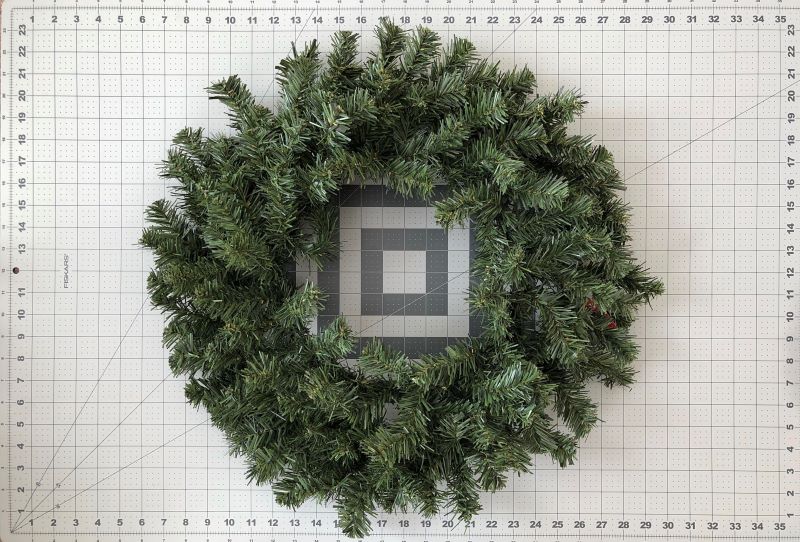
Starting off with the evergreen wreath base, take a few minutes to fluff each of the tips that may be tangled together and position them to fill in holes where necessary. It doesn’t have to be perfect since you won’t actually see the evergreen much, but it will help later on when we start adding in our greenery and flowers.
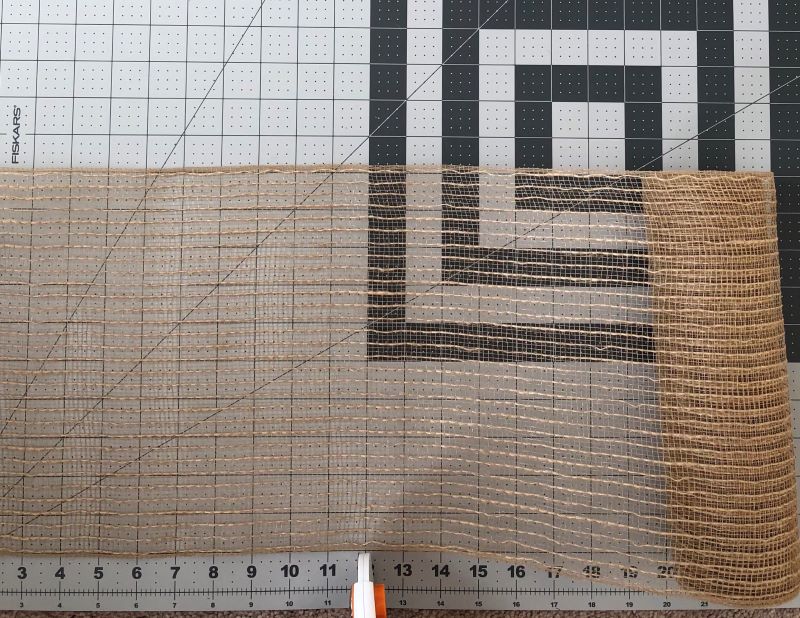
Now that the wreath is fluffed, next grab our roll of mesh. Unroll the mesh and measure out 12 inches and cut straight across with your rotary cutter (or scissors). Repeat 11 times. For this project we need 12 strips total, each measuring 12 inches long.
Adding Mesh to Wreath Base
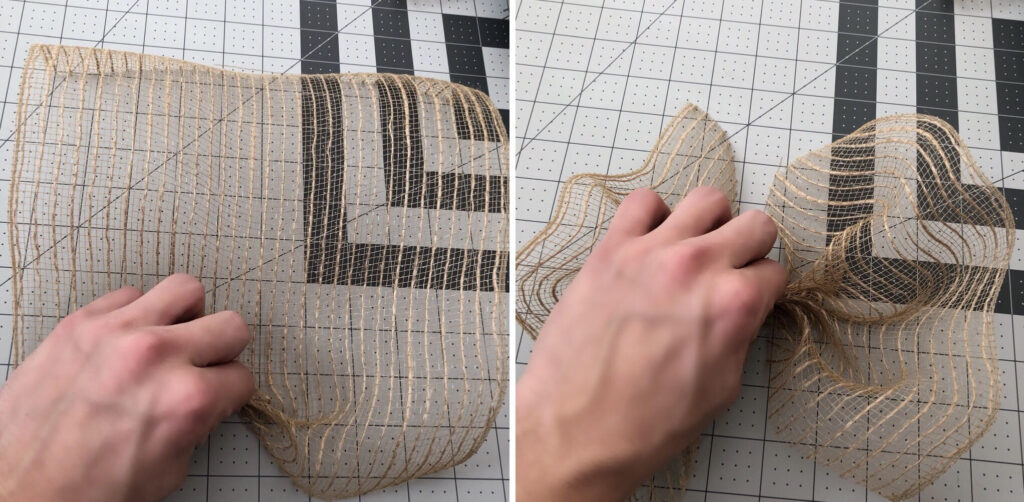
Once you have your 9 strips of burlap mesh cut, next let’s “ruffle” them to add some character and then incorporate them into our wreath. To ruffle, simply place one strip of mesh curl side down and with both hands pinch together the mesh repeatedly with your fingers until you get what looks like a bow tie.
Next, along the outer ring of your wreath place the mesh in between two twist-ties (or tips) and twist two or three times to secure the mesh in place. Spacing them evenly around the outer ring, repeat this 7 more times.
Use the remaining four pieces of mesh and place them along the inner ring of the wreath as pictured below.

Once your wreath base looks similar to the picture above, set it aside and proceed to the next step.
Attach Sign to Wreath
Start off by removing any tags that may be on the sign, then lay it face down on your work area.
How you attach signs to wreaths depends on the material the sign is made out of and its thickness. The sign I’m using today is made out of solid wood and is approximately a half inch thick. Given the material and thickness, I recommend using a staple gun to attach florist wire to the back.
Always err on the side of caution when it comes to attaching items to your wreath. The last thing you want is something to fall off because it wasn’t properly secured.
With the sign laying face down on your work area, next we’ll get 4 pieces of florist wire and staple them to the top, bottom, left and right of the sign as pictured below. As an additional layer of security, go back and add some hot glue on each of the staples to ensure they don’t pop out.

Once the glue on the back of the sign has dried, bring the wreath base back to your work area and lay the sign on top of the wreath and make sure it’s centered both horizontally and vertically. When centered, feed through the florist wire and secure each of the pieces of wire to the metal frame of the wreath.
TIP: To ensure the sign is secured to the wreath, give it the shake test by shaking the wreath back and forth. The sign shouldn’t move at all if properly attached.
Adding the Greenery
Now that we’ve attached the sign to the wreath, now let’s prep and add the greenery. This is where our DIY spring wreath will really start taking shape!
Start off by taking apart the olive leaf bushes. Depending on the greenery spray or bush you use, you may need to either cut the stems with wire cutters or just pull each stem from the bundle as I did below. Before cutting, keep in mind that you’ll need at least 2-3″ of stem so you can secure it to your wreath.

Next apply hot glue to each of the stems and place them in the wreath.
TIP: Spacing really matters when it comes to adding elements to your wreaths. For example, if you add a stem to the top, add the next stem to the bottom. If you add a stem on the right, place the next stem on the left, and so forth. This will give your wreath balance and proper spacing.
Now that you’ve added all of the olive leaf stems, do the same thing for the rest of the greenery – filling in other areas of the wreath base. (Just make sure not to completely hide the mesh! 🙂 )
Adding the Roses and Queen Anne’s Lace
Now that the greenery has been added, we’ll add the three large coral roses.
Adding these will be a little different since our roses will be focal pieces. You’ll want to place them in the shape of a triangle to give your wreath an overall balanced appearance.
Next we’ll add in the smaller cabbage roses for additional color. Take apart the bush (just as we did the greenery above) leaving 2-3″ of stem and evenly place them throughout your wreath.
Be creative with the cabbage roses, they don’t all have to be fully visible or facing the exact same way – it’s actually better if they don’t to give a natural, garden-style look.
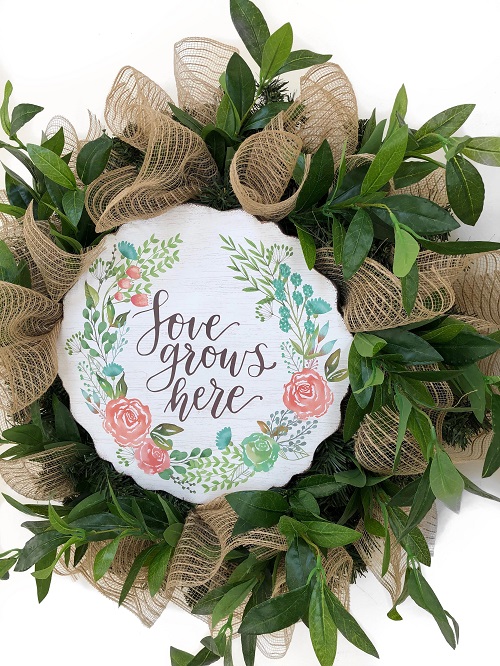
Lastly, you’ll “sprinkle” in the Queen Anne’s Lace to give some contrast with pops of white. Add these in areas that appear dark to brighten that part of the wreath.
Enjoy this Garden-Style DIY Spring Wreath? Pin It For Later!
I hope you enjoyed this tutorial as much as I did! Please consider sharing this DIY spring wreath tutorial with your friends.